Friday, May 24, 2013

Pull Tab in Cases of Creativity

Pop Tab...
Pull Tabs...
Aluminum Tabs...
Soda/Can Pull out Tabs...

These tiny things seem useless once we have pulled it out (unless you make it as a straw holder when drinking your soda) but you will be amazed at the wonderful and creative things that can be made out of these seemingly unreusable thing.

But first, let me share the easiest way to reuse this... as a "Picture/Frame Hanger".

Materials/Things You'll Need:

  • one aluminum tab (for best results, the ring should still be attached but if not compensate it with the size of the screw head)
  • screw (for best results, use a screw with a head slightly bigger than the hole/ring of the tab)
  • screw driver
  • frame or anything that you want to hang
  • pencil and ruler (optional)
Step 1
Measure the center of the frame where you want to put your tab to hang your frame and mark it with your pencil.

Step 2
Align the tab and screw to the marked point and secure it to the frame. (Make sure the length of your screw does not penetrate the entire frame up to the front or else find a shorter screw.)
Tab with the ring still intact.
http://www.apartmenttherapy.com/hang-artwork-
with-recycled-pop-142661
Make sure the tab is at the center of your frame
for balance.
Step 3
Once it is secure (make sure its not loose or moving) place it on a nail on your wall. (You might want to bend the upper part of the tab so it would be easier to hang).  And you're done!
Align the tab to the nail and hang the frame.

And it's up on the wall.


Below are some other creative ways to reuse these tabs:
  • accessories (earrings, necklace, pendant, bracelet, pin)
  • purse, belts, hats
  • keychain
  • but before that here's a keychain I made by combining two designs:
    there are a ton of instructions on youtube for the flower and bracelet design.
    just choose which ones teach the best for you. ^_^

Purple/Turquoise/Kiwi Pop Tab Earrings
by Cheryl's Art Box, via Flickr
http://tabsolute.blogspot.com/2012_02_01_archive.html


soda tab ribbon necklace
via etsy.com


Pull Tab & Electronics Resistors
 by Junksmith, via Flickr
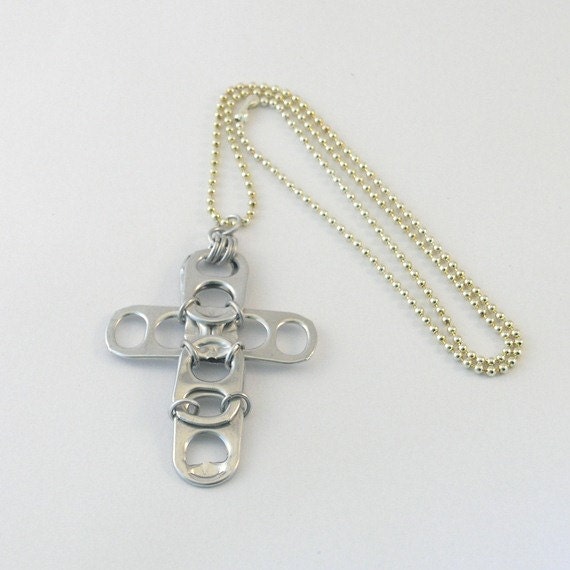
pop tab cross pendant
via etsy.com
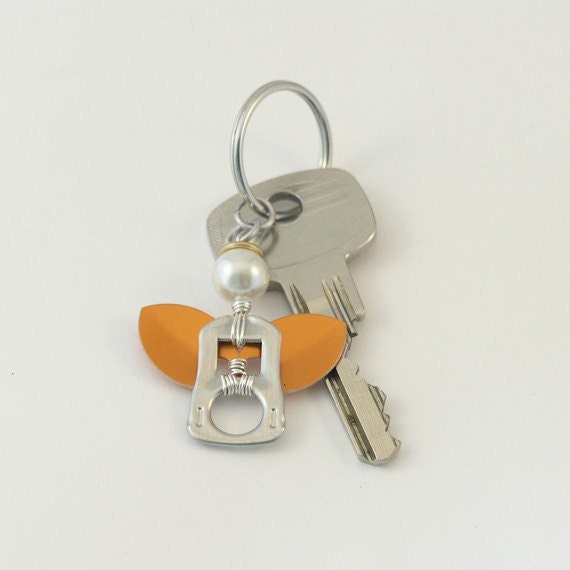
pop tab angel keychain
via etsy.com
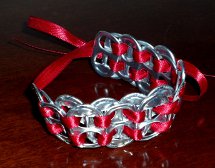
DIY-Pop-Tab-Bracelet
http://www.allfreejewelrymaking.com/Jewelry-Videos
statement PIN/button via
perniciousprince.tumblr.com


boy+girl via
tabsolute.blogspot.com
soda ring Lamp Shade via
http://www.duitang.com/people/mblog/16910536/detail/
www.greatrecycledgifts.com
soda pop tab HAT
http://tabistry.blogspot.com/2008/06/
jeudi-warrior-princess.html
http://www.recyclart.org/2009/02/can-key-ring/
coasters
http://www.crookedbrains.net/2011/06/
creative-cool-uses.html
square coaster via
http://tabsolute.blogspot.com/2012_02_01_
archive.html
necklace via
1.bp.blogspot.com
http://tabsolute.blogspot.com


Thursday, May 23, 2013

All bottled up (Gifts in a Recycled Bottle)


Last Christmas, I made this as a gift for the children. Instead of the usual putting-the-candies-or-other-small-stuff-into-their-Santa-stockings... I made use of these plastic bottles lying around waiting for Mister-Recycle-Man to get it from me.
So.. I challenged myself to reuse these bottles for the season of gift giving... and after some google search, I saw some people using plastic bottles to give as a give-away... I made my own version to fit in the Christmas season.
And an added bonus is that I didn't have to break the bank to give these gifts.


Materials/Things you'll need:
  • plastic bottle (better to use the ones with soft body to make it easier to cut)
  • cutter/exacto knife (scissors will do but it's quite a challenge to make that first cut)
  • marker (optional)
  • candies/chocolates/small gift items (its up to you how inexpensive you like it to be)
  • fillers (e.g. lucky star origami, confetti, shredded colorful papers/shiny papers, small rolled-up papers)
  • adhesive tape
  • art/construction papers (as design)

Step 1
Clean your bottle. Take out the label and make sure the inside is clean and dry. 

Step 2
Find a part of the bottle that will serve as its opening. (It's usually the part where it was covered with the label). Using a marker, make a U-shape (make sure its big enough to place your gift items) and  cut/slice through it. (In my case, I didn't use any markers and just cut right away). Just make sure to make a clean cut on the edges of your opening. (you can always use a pair of scissors to cut the sides clean to avoid sharp edges).
Step 3
Arrange your small gift items and your fillers. Your fillers will serve as a stabilizer and a design at the top and bottom part of your bottle and it will be the only visible thing from the outside. The small gift items placed at the middle part of the bottle will be covered with your art papers.

A clean cut opening to place in your gift goodies.

Arranging the goodies and fillers inside the bottle.

Step 4
Seal the opening with a tape.

Step 5
Make a design out of your art/construction paper. Make sure that the design is big enough to cover the opening and long enough to go around the bottle. (Use your creativity) And tape it.

Santa Belt design to cover the opening and the goodies inside.


It's long enough to go around the bottle and
 big enough to cover the goodies inside.
I added a small Santa Hat on top of the bottle cap
to make it look more festive.
Notice that the fillers are the only visible things in the bottom & top part.
The gift items are covered up and left as a surprise.
Now your bottle gift is ready to be given away. ^_^

Other suggested designs:
using 2L plastic bottles
Get Well Soon & Spa Day Gift Bottles via
http://www.gluesticksandtape.com/2011/01/gifts-in-coke-bottle-recycled-coke.html

my mother's day version

http://www.thetipgarden.com/2012/02/diy-recycled-bottle-gift-container.html

http://www.iheartcraftythings.com/2012/06/slimy-super-pop-and-shirt-cards-fathers.html